NOTE: If you’ve not yet read Minecraft Educaton Edition #MinecraftEE – Part 1: A First Look, you might like to visit that post and then return here for Part 2.
Sunday Morning: A Tutorial World
Sunday morning I came across a tweet linking to a Tutorial world for use with Minecraft: Education Edition, and the file shed some bright lights 🙂 on the as-yet-to-be-seen education features.
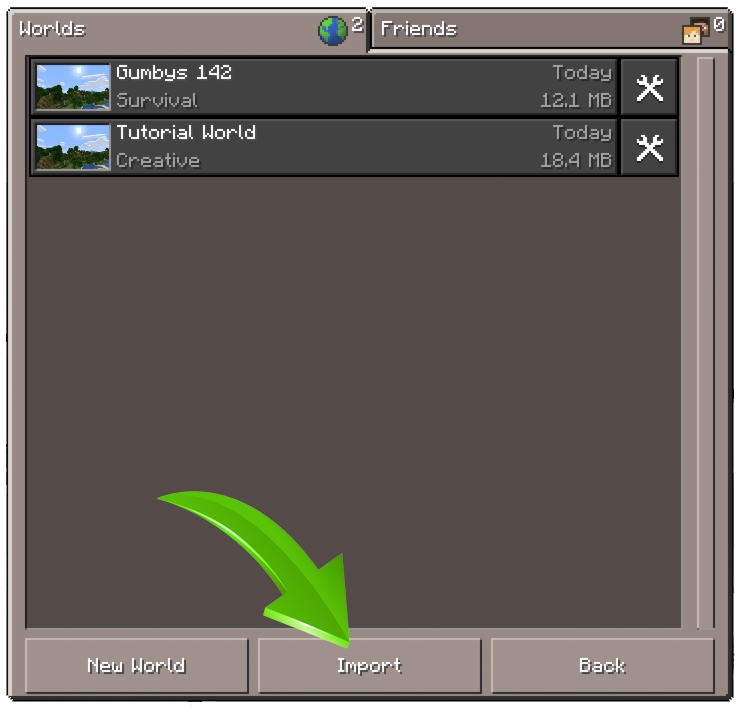
The file was easy to download (obtain Tutorial World.mcworld here) and super easy to import with the new Import/Export interface. (NOTE: This one feature for sure beats rooting around (pun) in the Library/Application Support/Minecraft/Saves for a folder of data to share, as is currently the case with vanilla Minecraft!)
NPCs: Upon launching the file, I was greeted with an NPC (non-player character) “Tour Guide” who welcomed me to the tutorial. The NPC is a previously-available-via-mod Minecraft feature which has now been built natively into M:EE. Clicking on the “Tour Guide” provided a large space to provide text-based information to learners, as well as an active link to a video on youtube, Welcome to Stage 1. Nice.
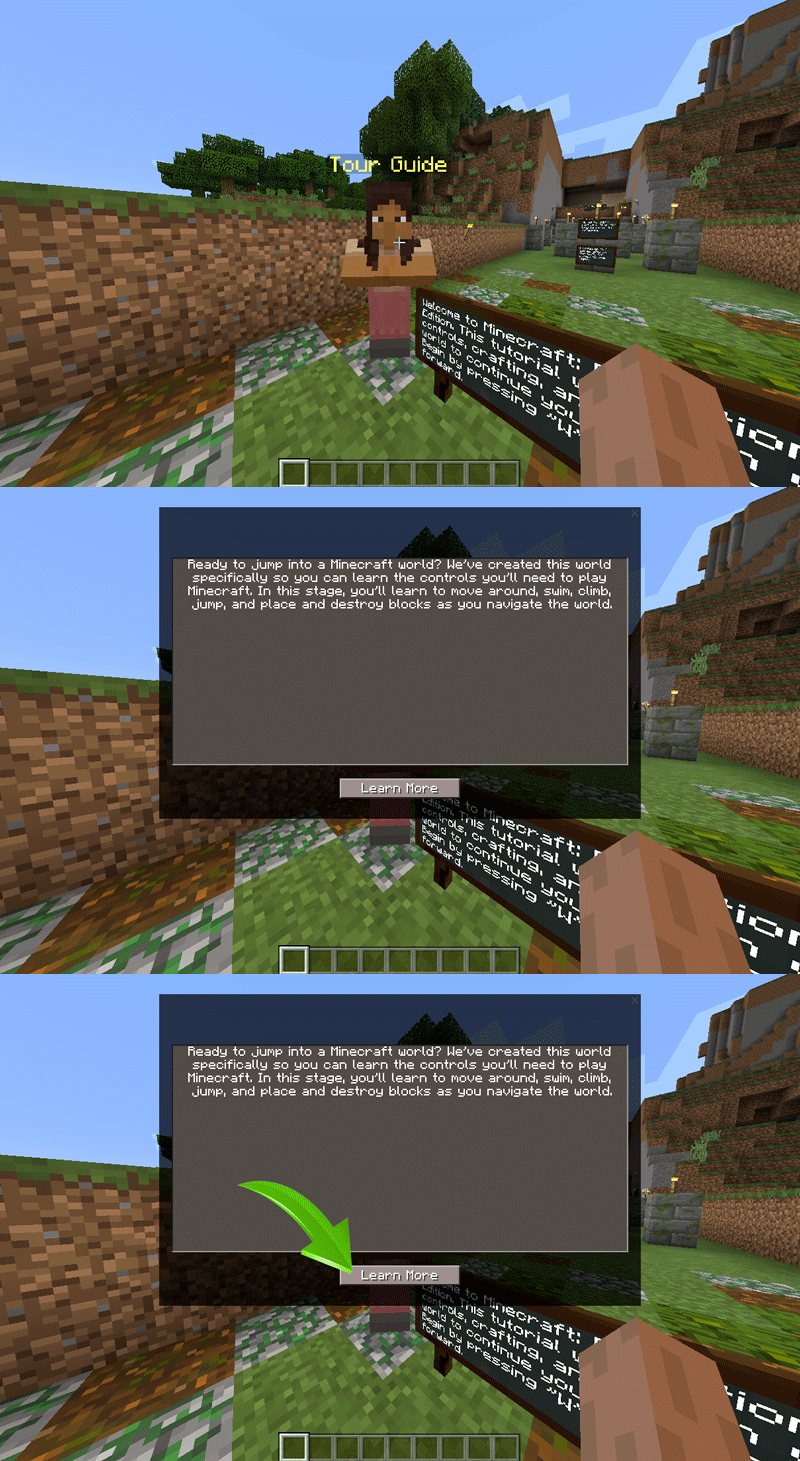
It’s an NPC Tour Guide! Hooray! The NPCs dialogue button “Learn More” links out to Youtube. Very cool.
The tutorial world provides a brief introduction to movement, crafting, and an “open world” exploration before introducing the specific #MInecraftEE education features. The tutorial sequence was not unlike that experience found in the MinecraftEDU tutorial world (or the Teacher Training Zone #TTZ) on the GamingEDUs Professional Play server, but it moved quickly through three stages:
Stage One: Movement (WASD, space) for navigation, mouse-look, lever to open door, breaking blocks, swimming, breaking and placing blocks, climbing ladders.
Stage Two: Crafting (harvesting (punching) wood, inventory, planks and sticks, crafting a Crafting Table, recipe for crafting a pick), and breaking through stone,
Stage Three: Open World (exploring a stone pick, making torches, mining coal and iron ore, building a door, harvesting and replanting carrots and wheat, making bread, and finally making a furnace and smelting some iron — I added those last two.)
Here’s a little video of my adventures through Stages One, Two, and Three.
After working my way through Stages One, Two, and Three, I arrived at the hoped-for Stage Four: Education Edition Features They do exist in this release! Hooray! You just need to know how to find them.
The Camera
New in #MInecraftEE is a camera block, which allows you to easily capture an image of a scene or take a selfie. You can either place the camera on the ground to capture an image, or simply right click while holding the camera in your hand. Note that the ability to take full-screen captures exists in vanilla #Minecraft through the F2 key — the only challenge is (again) rooting through and digging the images out of the Library/Application Support/Minecraft/screenshots folder. #MInecraftEE makes this a bit easier for learners and teachers alike, although I would like a full-screen option as well as the “polaroid” form factor image. You can see me holding the camera block in each of the “polaroid” images below.
The Portfolio
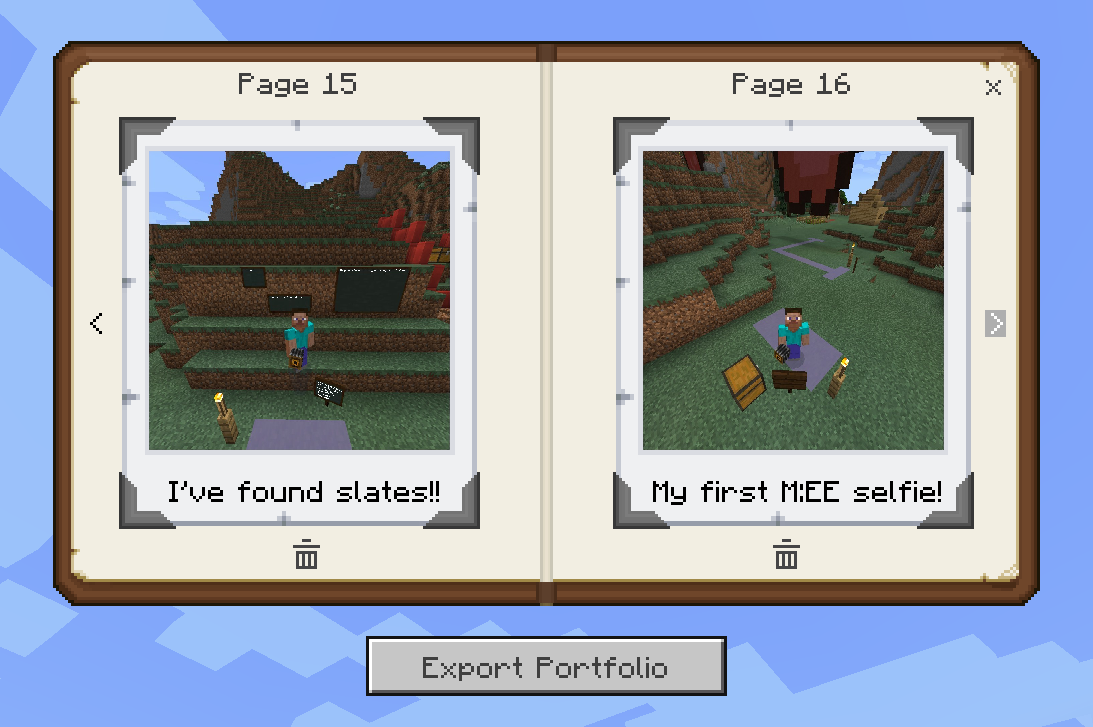
The Portfolio provides a two-page-at-a-glance book interface, with a captioning option. The Portfolio can be exported.
The Portfolio collects images taken with the Camera, and provides a captioning facility to allow learners and teachers to provide a brief annotation. The text is styled in the blocky-Minecraft script. It’s a bit hard to read, both on-screen and when the images are exported via the Portfolio’s export function. (The portfolio creates a .zip file, which contains one file for each “photo” taken — any added caption is included as part of the image.) But again, this is a step-up from the vanilla F2 screen capture.
Allow and Deny Blocks
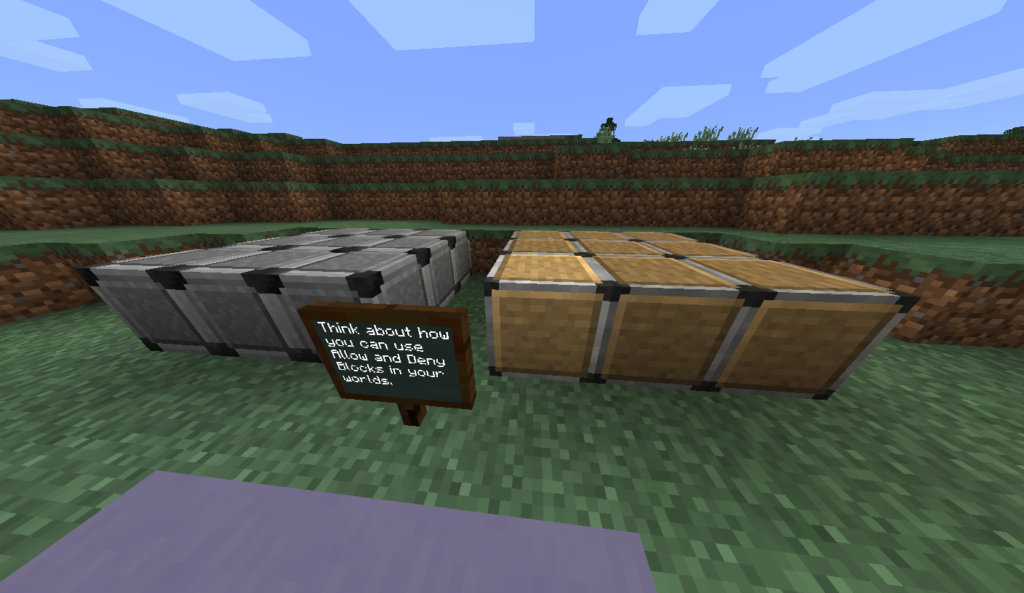
#MinecraftEDU provided a number of options for ensuring that areas of an instructional world file remain unchanged by visitors. Essentially a binary pair of blocks (placed below ground level) either permit or deny changes to the blocks above. The #MinecraftEE Tutorial World has the Allow and Deny Block on display, but they are really not implemented in the tutorial so as to demonstrate how they might be used. Rather, the educator is prompted to “think about how you can use Allow and Deny Blocks in your worlds.” This is something likely to be remedied in an updated Tutorial World file in the near future, I’d guess.
Slates, Posters, and Boards
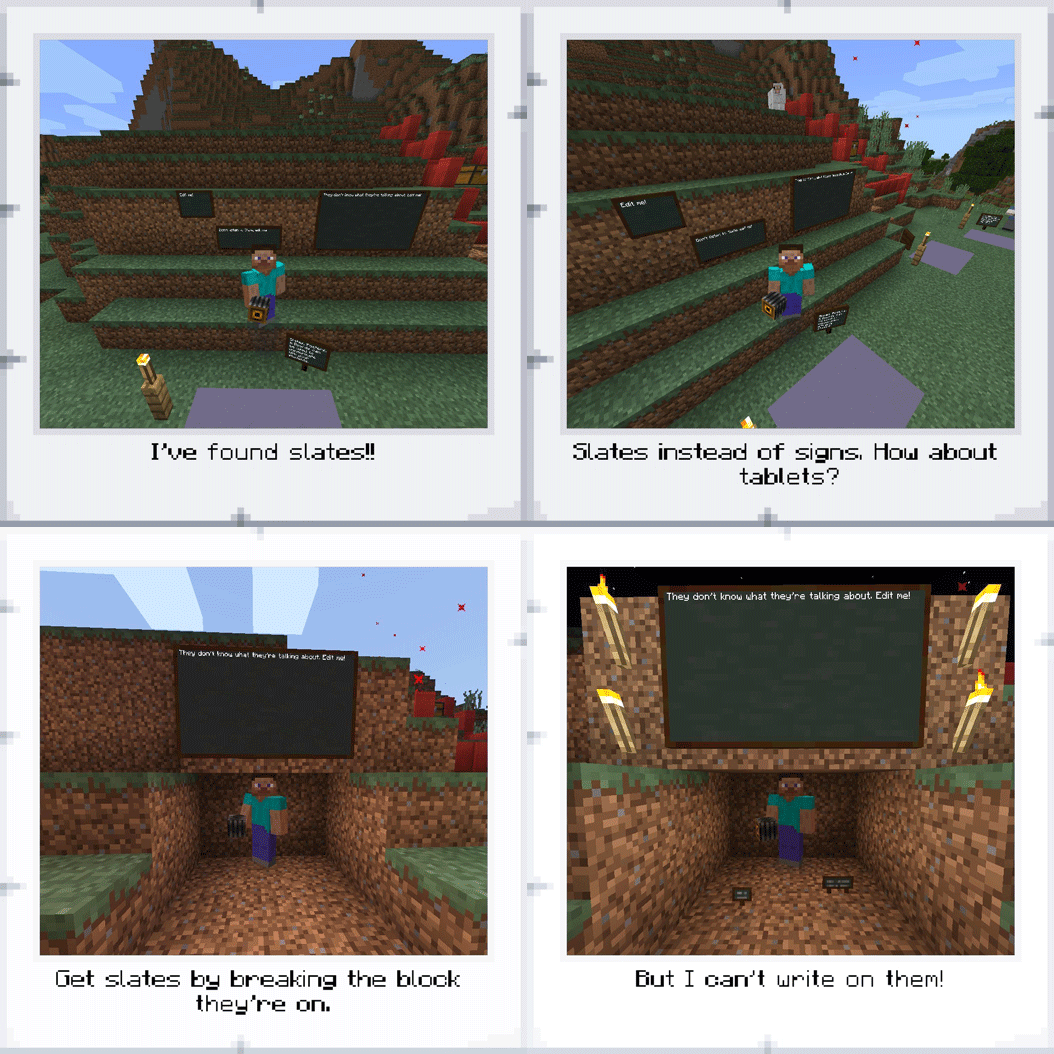
Upon seeing the Slates, Posters, and Boards, my second thought (after asking “Why can’t I break or edit these?”) was, “Why aren’t these iPads or electronic display boards?” I find it odd that we revert to the blackboard metaphor in this day and age. Granted, they are a step up from wooden signs, but only just. (The answer to “Why can’t I break or edit these?” appears in Part 3. You’ll notice I was able to detach them from their placements …
Boundary Blocks
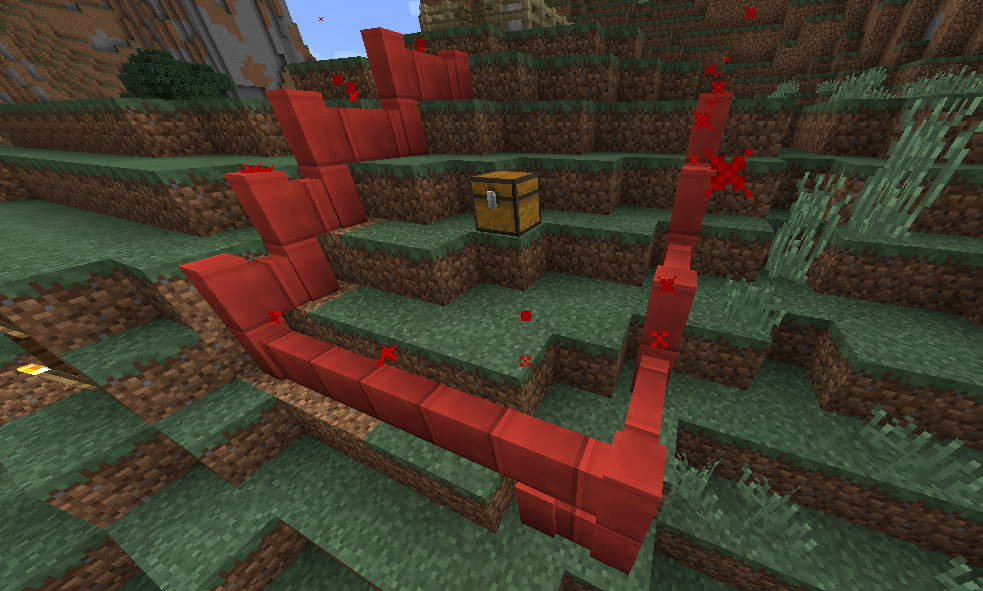
Another feature that has made it through from #MinecraftEDU is the boundary block. In the TeacherGaming version, the boundary blocks have no animation, and my application has always been to bury them under ground (with deny blocks beneath). The effect is that a player reaches an impassable boundary, and receives a message to that effect. In the #MinecraftEE implementation, the Boundary Blocks have a red, fiery animation. The effect is the same — the player cannot cross or fly over the boundary — or dig under. Again, my inclination would be to continue to bury them — thus adding a sense of magic to the play. These boundary blocks do not appear to provide a message to the user.
NPCs (Non-Player Characters)
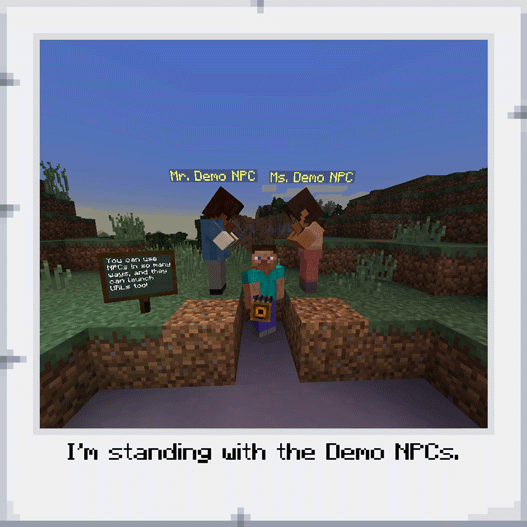
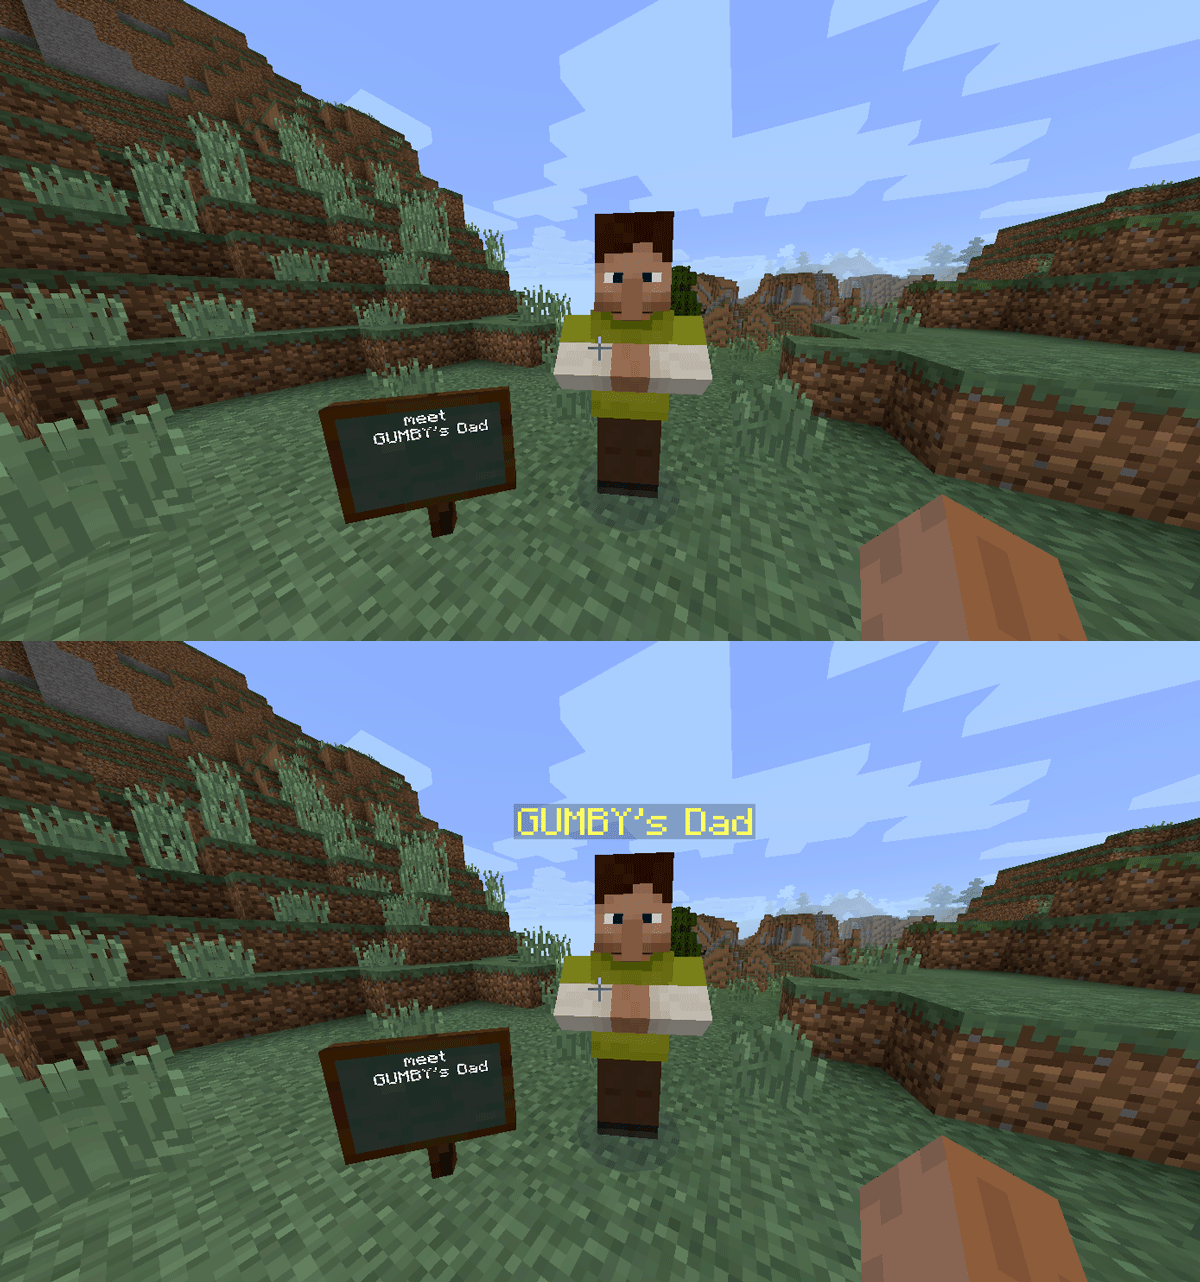
Mr. and Mrs. NPC appear at the end of new Education Edition features. They are standing there, with their names displayed above them. Aside from that, they don’t really say or do anything. It appears that NPCs as implemented in #MinecraftEE do not move. They are essentially interactive signs, with the option to provide an active web link. They track to face you as you move about them.
In closing, The Tutorial World was not immediately forthcoming as to how to use the Slates, Posters, Boards, or NPCs.
But as I wound down my second (Sunday morning) session with #MinecraftEE, I poked around a bit and came across a key to what will form the bulk of the next part in this series:
Minecraft Education Edition #MinecraftEE – Part 3: Digging Even Deeper
That key allowed me post a sign slate, and find Gumby’s Dad! And he even knows the link to GumbyBlockhead.com!!
The story continues ….


Pingback: Minecraft Education Edition #MinecraftEE – Part 1: A First Look | GumbyBlockhead.com
Thanks for the tutorial…much appreciated!
Pingback: Minecraft Education Edition #MinecraftEE – Part 3: Digging Even Deeper | GumbyBlockhead.com